

/pm/patients) displays the organization’s patient roster and provides a registration form for adding new patients.
Overview
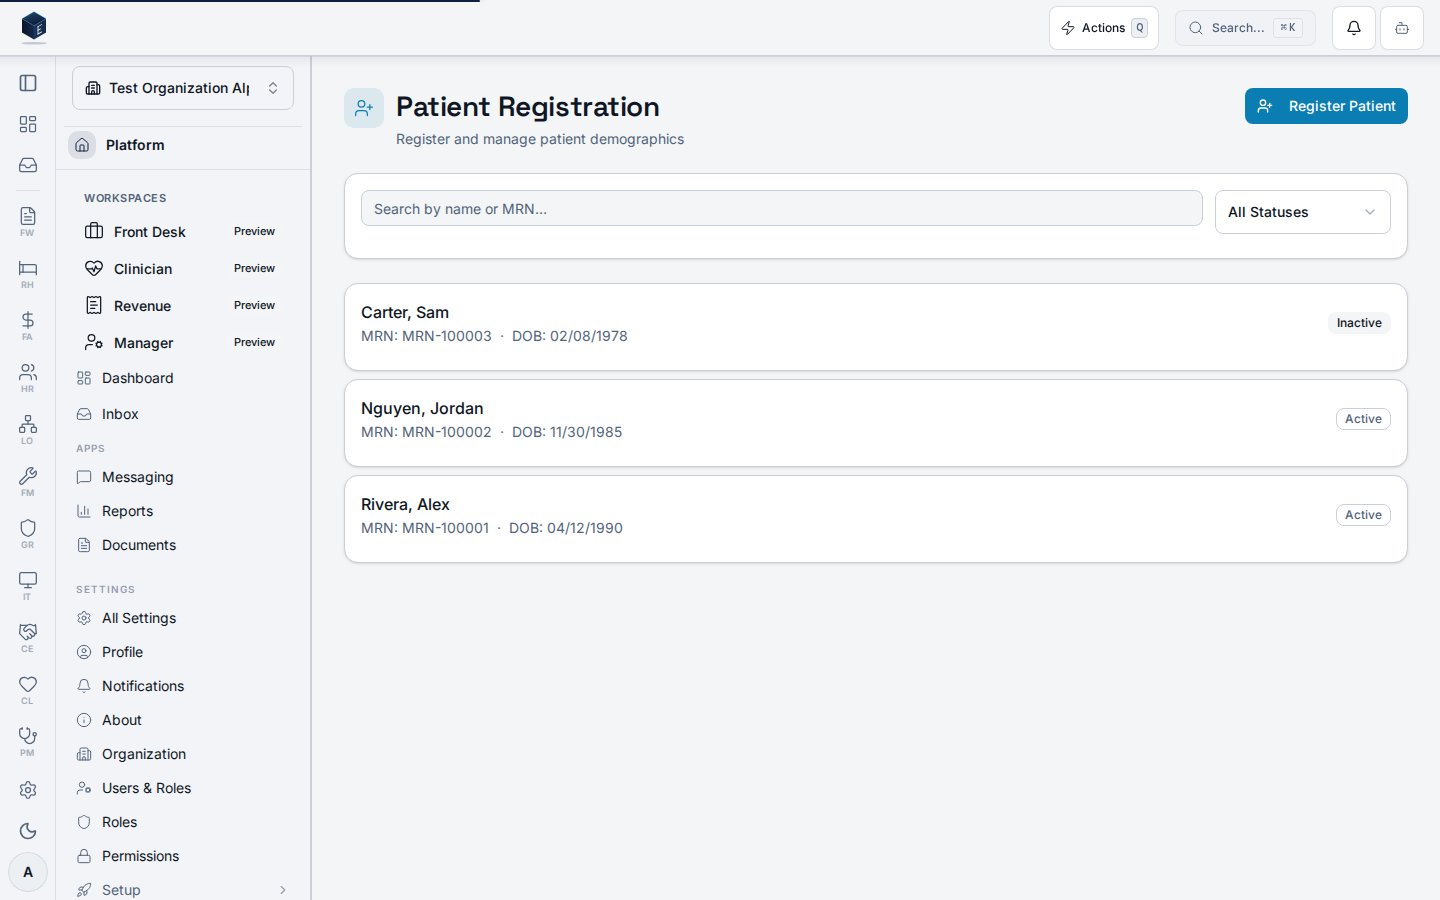
The screen renders a searchable, filterable card list of patients drawn frompm_patients, always scoped to the current organization and excluding soft-deleted records. Each patient card displays last name, first name, preferred name (if present), MRN, date of birth, and optionally a jurisdiction member ID. A status badge on each card reflects the patient’s current status: Active, Inactive, Discharged, or Deceased. Clicking a card navigates to the patient detail page at /pm/patients/:patientId. Users with the pm.patients.create permission see a Register Patient button that opens PatientRegistrationForm. The search input is debounced (300 ms) and matches against last name, first name, and MRN.
Who it’s for
Requires thepm.patients.view permission. Registering new patients additionally requires pm.patients.create.
Before you start
Requires thepm.patients.view permission. Patient data will not load if no organization is currently selected. The URL query parameter ?action=new automatically opens the registration dialog if the user also has pm.patients.create.
Steps
1
Search for a patient
Type a name or MRN in the search field. Results update after a short delay (300 ms debounce). The list filters across last name, first name, and MRN simultaneously.
2
Filter by status
Use the status dropdown to limit the list to patients with a specific status: Active, Inactive, Discharged, or Deceased. Select All Statuses to clear the filter.
3
Open a patient record
Click any patient card to navigate to the patient’s detail page at
/pm/patients/:patientId.4
Register a new patient
Click Register Patient (visible only with the
pm.patients.create permission) to open the registration form dialog. Complete the required fields and save to add the patient to the roster.Key concepts
Empty state — no patients found
Empty state — no patients found
When the list returns no results with active search or filter criteria, the screen shows “No patients match your search criteria. Try adjusting your filters.” When there are no patients at all (no filters applied), it shows “Register your first patient to get started.” with a Register Patient action button.
Error state
Error state
If the data fetch fails, a card is displayed with a sanitized error message in place of the patient list.
Viewing a patient
The Patient Details page is the central record for an individual patient, providing tabbed access to demographics, contact information, insurance, and financial data. Route:/pm/patients/:patientId (permission: pm.patients.view). Merge-related actions additionally require pm.patients.merge.
PatientDetailPage reads patientId from the route and loads data via usePatientDetail, useChartByPatientIdentity, and usePatientIdentifierConfig. The dynamic breadcrumb is set to the patient’s full name once loaded. Eight tabs are available, controlled by URL state (tab param):
- demographics — core patient fields, edit via
EditPatientDemographicsDialog - addresses — physical and mailing addresses via
PatientAddressFormDialog - contacts — emergency contacts via
EmergencyContactFormDialog - guarantors — financial guarantors via
GuarantorFormDialog - insurance — insurance coverages via
PatientInsuranceList - financial — financial assessments via
PatientFinancialAssessmentList - transfers — site billing transfers via
PatientSiteTransferSection - lead-history — intake/lead history via
PatientLeadHistory
PermissionGate.
1
Open the patient record
Navigate to Practice Management → Patients, search for the patient, and click their name. Alternatively, go to
/pm/patients/:patientId directly.2
Review demographics
The Demographics tab (default) shows core patient identifiers, status badge, and identifier fields. Click Edit to open the demographics dialog (requires edit permission).
3
Manage addresses
Switch to the Addresses tab to view, add, or remove physical and mailing addresses.
4
Manage emergency contacts and guarantors
Use the Contacts and Guarantors tabs to add, edit, or remove records via their respective dialogs.
5
Review insurance and financial data
The Insurance and Financial tabs display coverage and financial assessment records for this patient.
6
View site transfers and lead history
Use Transfers and Lead History tabs for operational and intake tracking information.
active, inactive, discharged, deceased.
Chart linkage — useChartByPatientIdentity links the patient record to a clinical chart via patient_identity_id.
Tab URL state — the active tab is persisted in the URL tab query parameter for shareable deep links.
Related
Practice Management
Overview of the Practice Management core.
Governance & parity
Documentation coverage and governance.
This page documents shipped product behavior. It is not medical, legal, or
billing advice. Verify against your organization’s policies and applicable
regulations before using it for clinical, compliance, or billing decisions.
Protected health information (PHI) shown in the product is governed by your
tenant’s access controls and is never exposed in this documentation.
Documentation sources
Documentation sources
- src/routes/pm.tsx
- src/cores/pm/pages/PatientListPage.tsx
- src/cores/pm/hooks/usePatientList.ts
- src/cores/pm/pages/PatientDetailPage.tsx
- src/cores/pm/hooks/usePatientDetail.ts
- src/cores/pm/hooks/usePatientIdentifierConfig.ts
- src/platform/permissions/constants.ts