

/ce/leads.
Overview
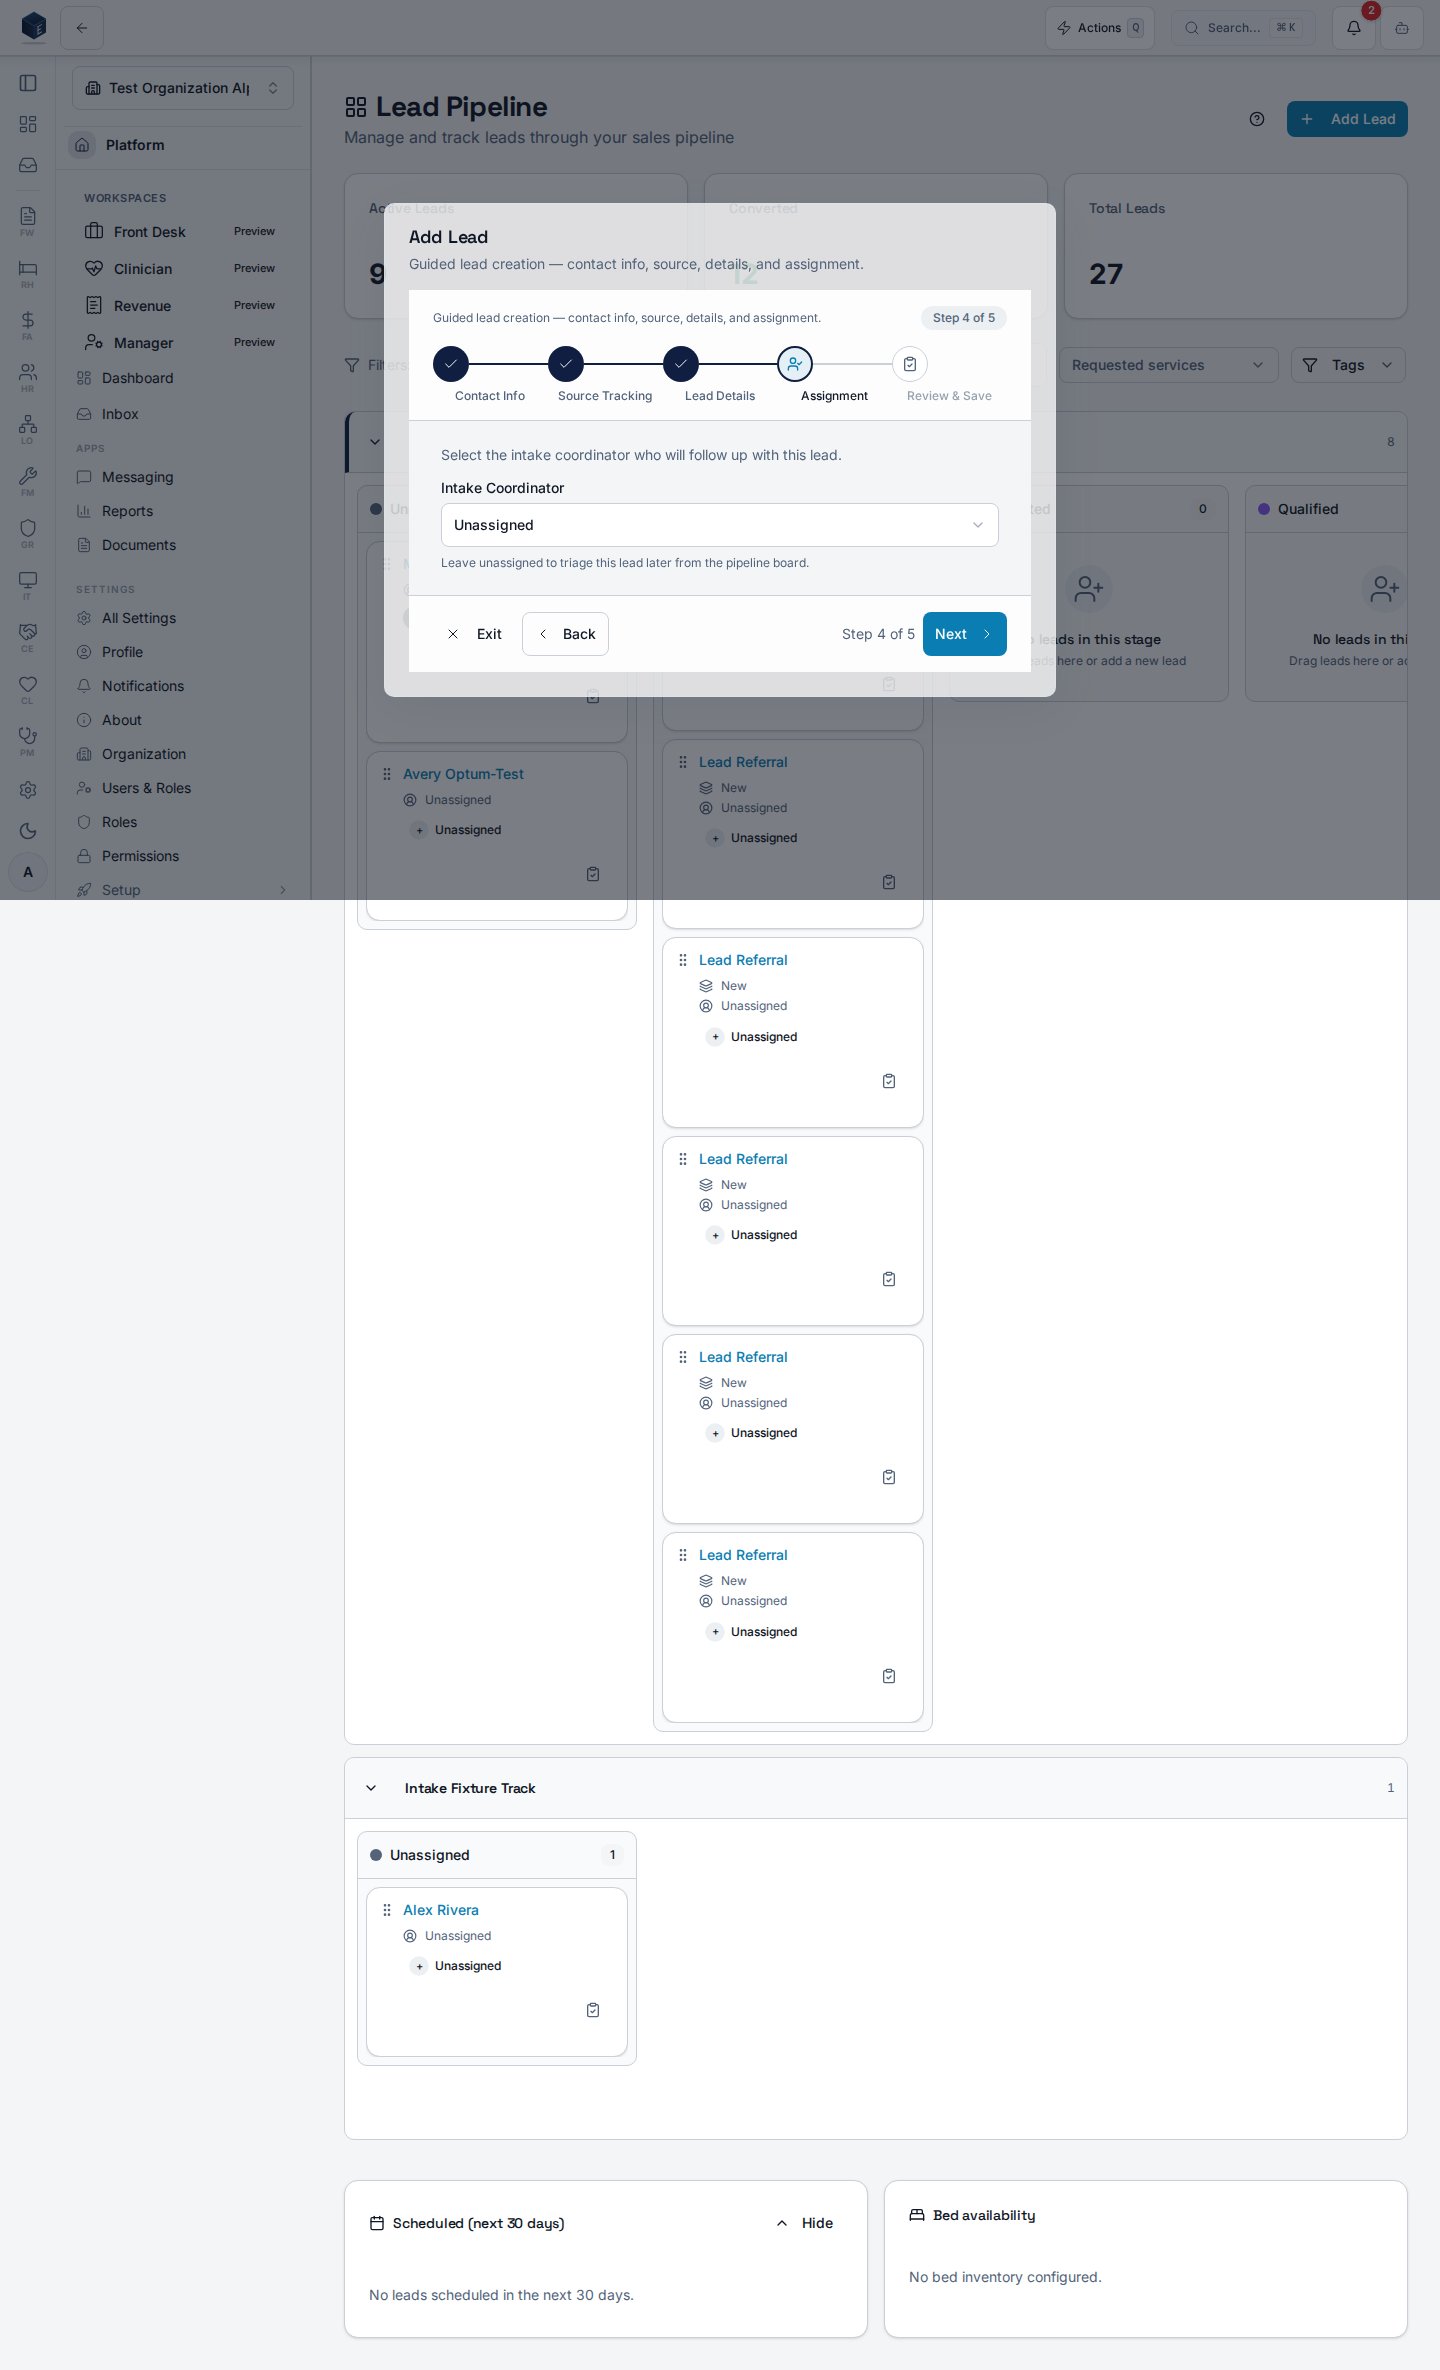
The Leads screen renders aLeadPipelineBoard in kanban format with columns for each configured lead stage. A header shows aggregate stat cards: Active Leads count, Converted count (shown in success color), and Total Leads. Filter dropdowns allow narrowing by assigned user (All Users, Assigned to Me, Unassigned) and by partner (All Partners). An Add Lead button opens the LeadIntakeWizard dialog. A guided tour (lead management tour) can be triggered via a Help button. Visiting /ce/leads?action=add-lead auto-opens the Add Lead wizard. The page loads up to 1000 lead records for the stat calculation.
Who it’s for
Required permission:CE_PERMISSIONS.LEADS_VIEW (route-level gate).
Before you start
- You need the
CE_PERMISSIONS.LEADS_VIEWpermission. - Lead stages must be configured; if no stages exist, the board may be empty.
Steps
1
Open the Lead Pipeline
Navigate to
/ce/leads via the Community Engagement menu.2
Filter the board
Use the Assigned to and Partner dropdowns to focus on a subset of leads.
3
Add a lead
Click Add Lead (or navigate to
/ce/leads?action=add-lead) to open the Lead Intake Wizard.4
Open a lead record
Click on a lead card to navigate to the lead detail page at
/ce/leads/:id.5
Take the guided tour
Click the Help button to start the lead management guided tour.
Key concepts
- Lead stage — configurable pipeline stages; each stage is a column on the kanban board.
- Lead status — active leads appear in the pipeline; converted and lost leads are excluded from the active count.
- Pipeline track — service-line row on the board (for example, Residential, IOP, Recovery housing). Each lead belongs to one track. See Pipeline tracks admin guide.
- Unassigned column — an active lead with no stage set appears in an Unassigned column under its own track row. If the lead’s track is inactive or missing, the board shows it under the org’s default track.
- Terminal row — the board groups converted and lost virtual columns into a single org-wide Terminal row at the bottom, separate from active track rows.
- Intake wizard —
LeadIntakeWizardcollects lead details, contact info, source tracking, and assignment. New leads default to Unassigned — the intake coordinator is chosen explicitly on the Assignment step (or left unassigned to triage from the board later). Choosing a specific coordinator requires thece.leads.assignpermission. - Lead urgency — every lead carries an urgency level: Critical (crisis / same-day), High (immediate need), Medium (within 1–2 weeks), or Low (exploring options). Urgency drives the on-board accents described in Urgency on the board and can be edited from the lead profile when you have
ce.leads.edit. - Pipeline track on new leads — both the Lead Intake Wizard (Lead Details step) and the quick Add Lead dialog include a Pipeline Track picker. Leave it on Auto (based on services) to let Encore OS resolve the track from the requested services, or pick a specific track to override. If neither an explicit pick nor the requested services resolve a track, the org’s default track is used.
- Inline partner quick-create — on the Source Tracking step, the Referring Partner search lets you create a new partner without leaving the wizard. Type at least two characters that don’t match an existing partner, and a Create “<name>” action appears in the results. Selecting it creates a partner with the typed name, a default type of Other, and a relationship status of Needs completion. The new partner is auto-selected as the lead’s source and appears on the Partners list with a Needs completion badge for later follow-up. Creating partners requires
ce.partners.create.
Urgency on the board
The board surfaces lead urgency in three places so triage and stand-ups can scan it without opening tiles:- Tile outline + name badge — leads at High or Critical urgency get a colored card outline and a small urgency badge next to the contact name. Low and Medium leads render with the default tile chrome.
- Stage-header leads popover — hover or keyboard-focus the list icon next to a stage header to open a popover that lists every lead currently in that stage, color-coded by urgency. Each name is a link to the lead’s profile. The popover reads from data already on the board, so it adds no extra fetch.
- Lead profile — the Lead Information card on
/ce/leads/:idshows the current urgency. Users withce.leads.editsee a dropdown to change it; everyone else sees it read-only. Urgency changes are written to the CE audit log automatically.
Track picker on new leads
When creating a lead — through the Lead Intake Wizard (Lead Details step) or the quick Add Lead dialog from the board header — a Pipeline Track selector controls which track the new lead lands on. Behavior:- If you pick a specific track, the lead is created on that track.
- If you leave the selector on Auto (based on services), Encore OS resolves the track from the lead’s requested services against the org’s active tracks (see Pipeline tracks admin guide).
- If neither path resolves a track, the org’s default track is applied.
Shared terminal row
The board’s bottom Terminal row collects converted and lost leads from every track into a single org-wide row. To preserve where a closed lead came from, each tile in the Terminal row shows a small source-track badge with the originating track’s name (for example,IOP or Residential). The badge appears only in the Terminal row — tiles on active track rows continue to render without it.
Viewing a lead
The Lead Details screen displays a single lead record with stage progression, contact details, sequence enrollment status, and screening history. It is accessible at/ce/leads/:id.
The screen shows a header with the contact name (derived from the linked contact record), lead status badge, and current stage badge. For active leads, action buttons include: Screen (requires ce.screening.create, navigates to /ce/leads/:leadId/screening/wizard), Mark Lost (opens LeadLostDialog), and Convert Lead (requires ce.lead-conversions.create, opens LeadConversionWizard). For converted leads, a Retry Conversion button (requires ce.lead-conversions.create) appears when converted_to_id is not set; a Revert to Active button is also available.
When the lead is linked to a contact, the header surfaces the contact’s documents inline:
- Document count badge — a clickable badge (for example,
3 Documents) appears next to the stage badge when you havece.contacts.documents.view. Click it to deep-link to the contact’s Documents tab at/ce/contacts/:contactId?tab=documents. The badge is hidden — and the count never loads — when you lack the permission, so document existence is never leaked. - Upload Document — an Upload Document action appears in the header when you have
ce.contacts.documents.upload. It opens the upload dialog and writes to the tenant-scoped, private contact documents bucket without leaving the lead.
LeadSequenceStatus) appears when the lead has a linked contact and the user has ce.enrollments.view. Two detail cards show Lead Information (source type, source details, expected admission date, notes) and Contact Details (name, email, phone with a link to the full contact record). A full-width conversion or lost-details card is shown for closed leads. Screening history and (for converted leads) conversion audit trail are rendered below.
Permissions — Screening requires ce.screening.create. Converting requires ce.lead-conversions.create. Enrollment viewing requires ce.enrollments.view. The lead ID must exist and belong to your organization.
Steps to work a lead record:
- Open a lead record by navigating to
/ce/leads/:id— click a lead from the Lead Pipeline or a contact’s Leads tab. - Review lead information — check source type, source details, expected admission date, urgency, and notes in the Lead Information card. Change urgency from the dropdown when you have
ce.leads.edit; the change is auto-audited. - Advance the stage — click a stage in the stage progression bar to move the lead forward.
- Screen the lead — click Screen (requires
ce.screening.create) to launch the intake screening wizard. - Convert the lead — click Convert Lead (requires
ce.lead-conversions.create) to start the conversion wizard. - Mark the lead as lost — click Mark Lost to open the lost reason dialog.
- Review screening history — scroll to the Screening History section to see all prior screenings for this lead.
- Review contact documents — click the document-count badge in the header to jump to the contact’s Documents tab (requires
ce.contacts.documents.view). - Upload a document — click Upload Document in the header to attach a file to the linked contact without leaving the lead (requires
ce.contacts.documents.upload).
active, converted, or lost; controls which action buttons are visible.
Stage — a configurable pipeline stage with name and color; shown in a stage progression bar.
Screening — a clinical intake screening can be launched for active leads; history is shown below.
Conversion — converting a lead creates a downstream record (type stored in converted_to_type); converted_to_id links to it.
Related
Community Engagement
Community Engagement core overview.
Governance & parity
Documentation coverage and governance.
This page documents shipped product behavior. It is not medical, legal, or
billing advice. Verify against your organization’s policies and applicable
regulations before using it for clinical, compliance, or billing decisions.
Protected health information (PHI) shown in the product is governed by your
tenant’s access controls and is never exposed in this documentation.
Documentation sources
Documentation sources
- src/routes/ce.tsx
- src/cores/ce/pages/LeadPipelinePage.tsx
- src/cores/ce/pages/LeadDetailPage.tsx