> ## Documentation Index
> Fetch the complete documentation index at: https://docs.encoreos.io/llms.txt
> Use this file to discover all available pages before exploring further.
# Proliant integration — setup walkthrough
> Step-by-step admin guide to connecting and activating the Proliant HCM integration, with screenshots of each wizard step.
## Overview
The Proliant setup wizard connects Encore HR to your Proliant/ReadyPay company in six guided steps.
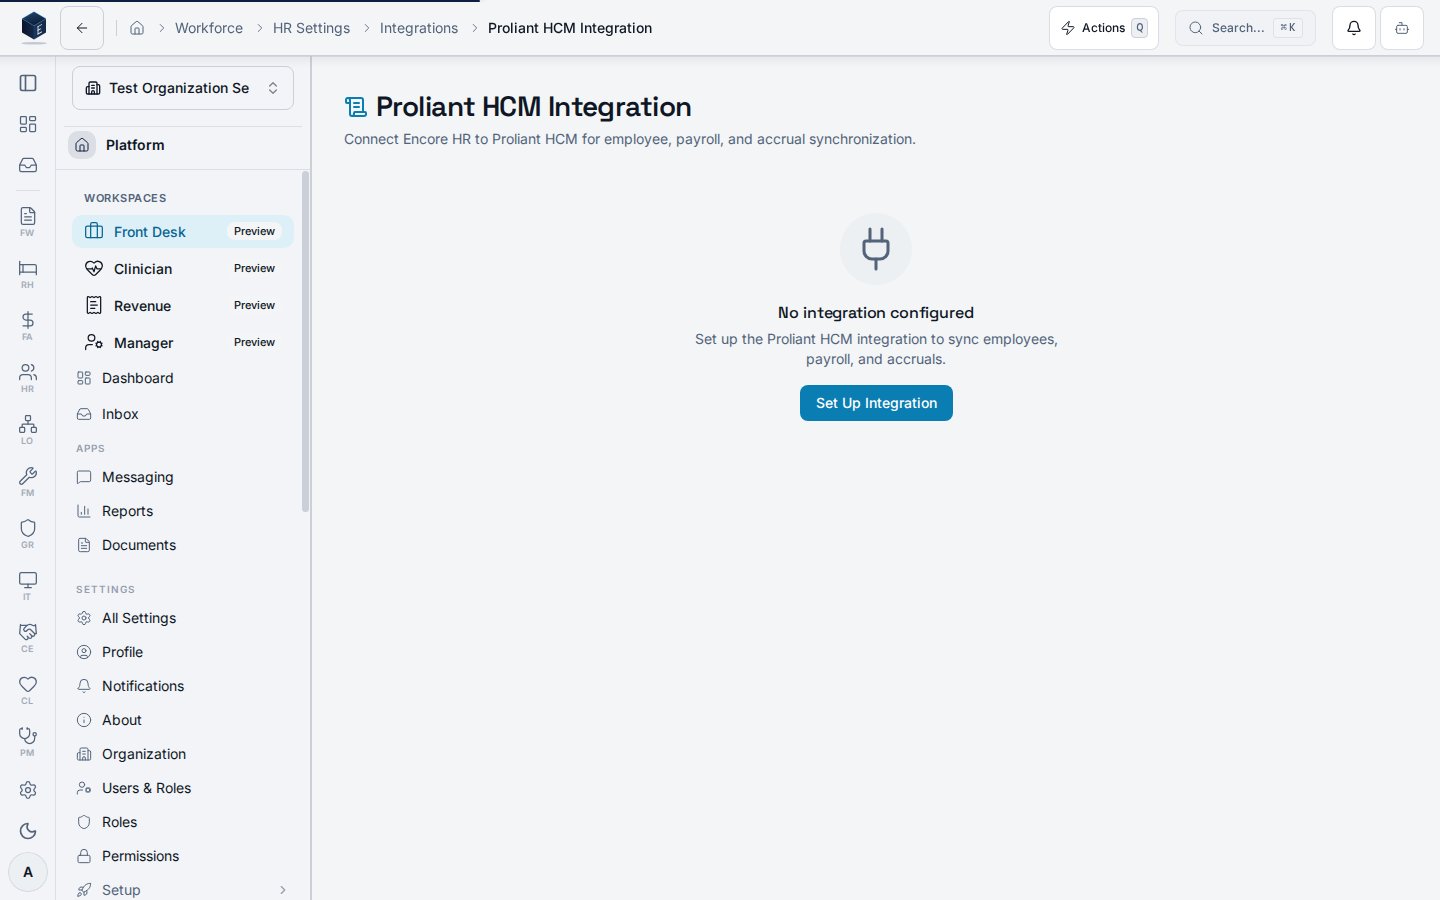
Open it from **HR Settings → Integrations → Proliant**. A clean organization (no integration yet)
shows an empty state with a **Set Up Integration** call to action.
The wizard now pulls and maps codes **before** Activate, and Activate stays disabled until every
required code family is mapped (or explicitly marked **N/A**) and the connection test has passed.
You can no longer go live with unmapped payroll inputs.
 Credentials are stored in the platform credential vault, never in the wizard draft. A successful
connection test is required before the integration can be activated.
## The wizard, step by step
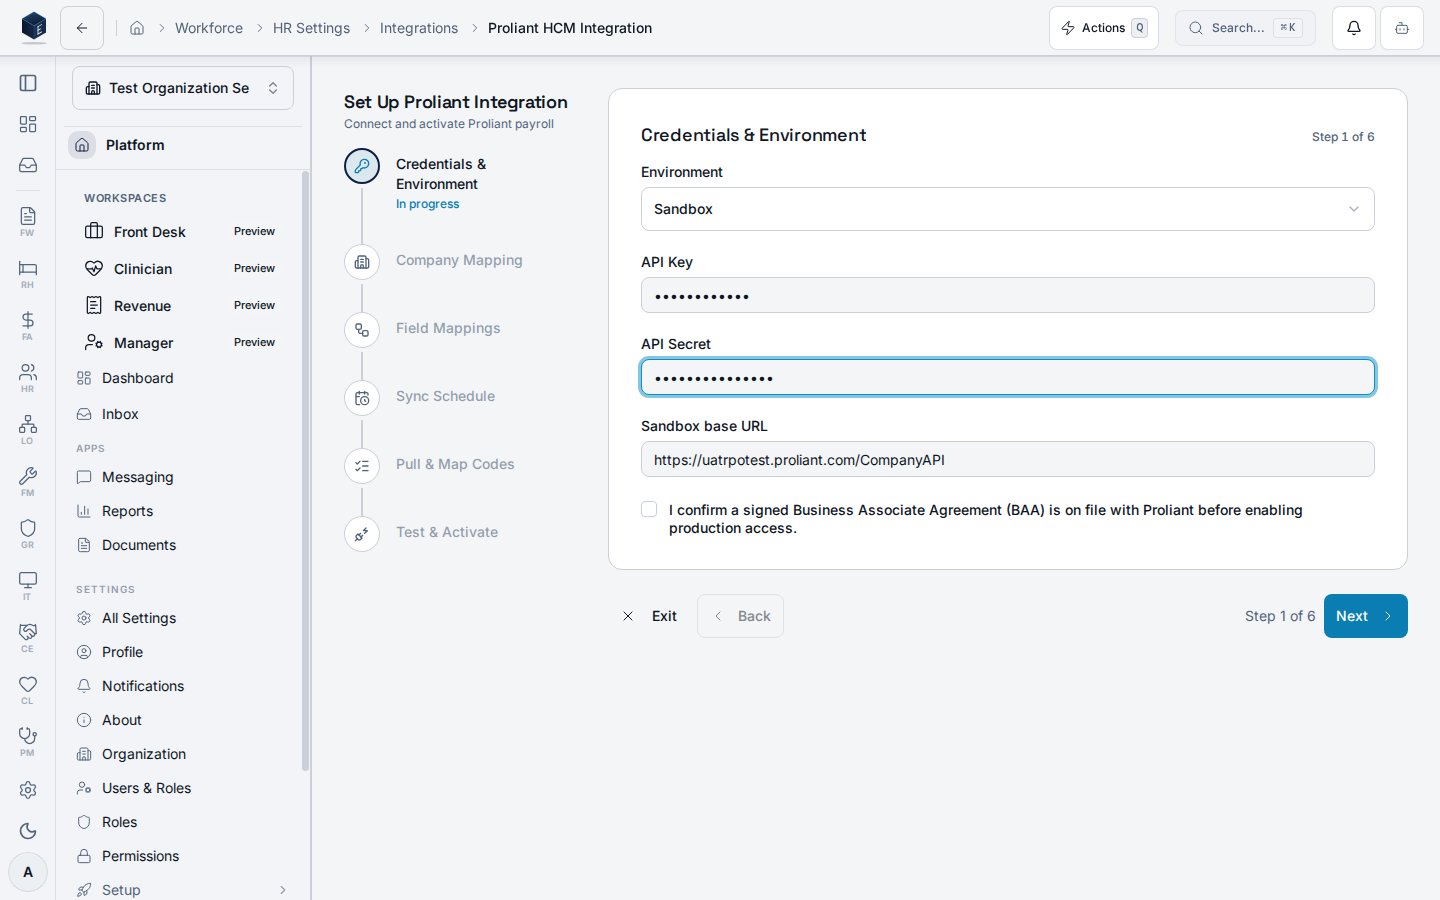
Enter your Proliant API key and secret and choose **Sandbox** or **Production**. The sandbox base
URL is pre-filled. Confirm a signed BAA is on file before enabling production access.
Credentials are stored in the platform credential vault, never in the wizard draft. A successful
connection test is required before the integration can be activated.
## The wizard, step by step
Enter your Proliant API key and secret and choose **Sandbox** or **Production**. The sandbox base
URL is pre-filled. Confirm a signed BAA is on file before enabling production access.
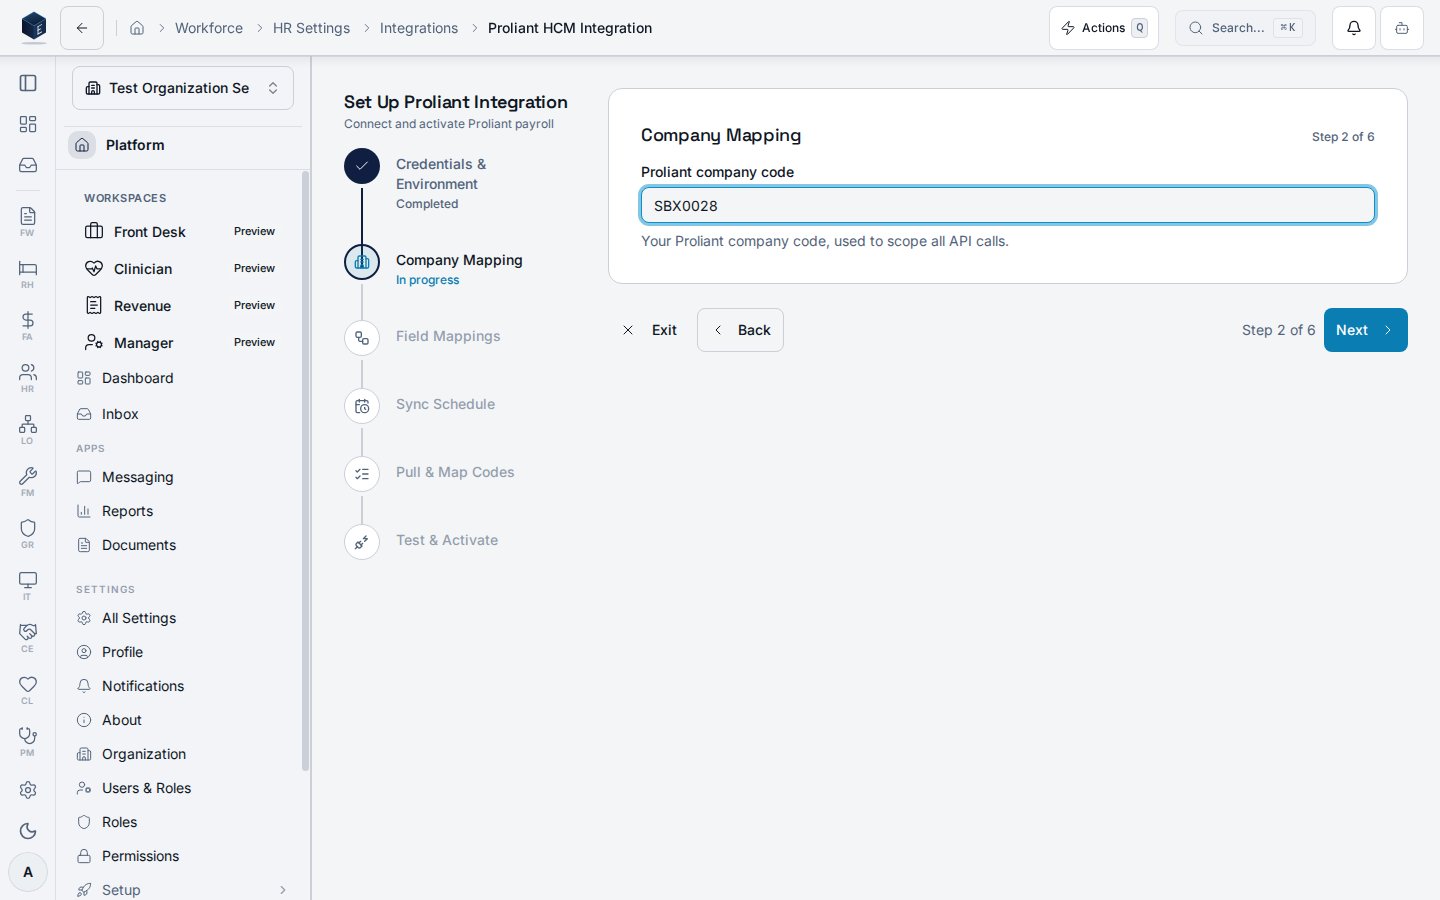
 Map this organization to its Proliant company code (for example `SBX0028`). Saving this step
creates the draft integration.
Map this organization to its Proliant company code (for example `SBX0028`). Saving this step
creates the draft integration.
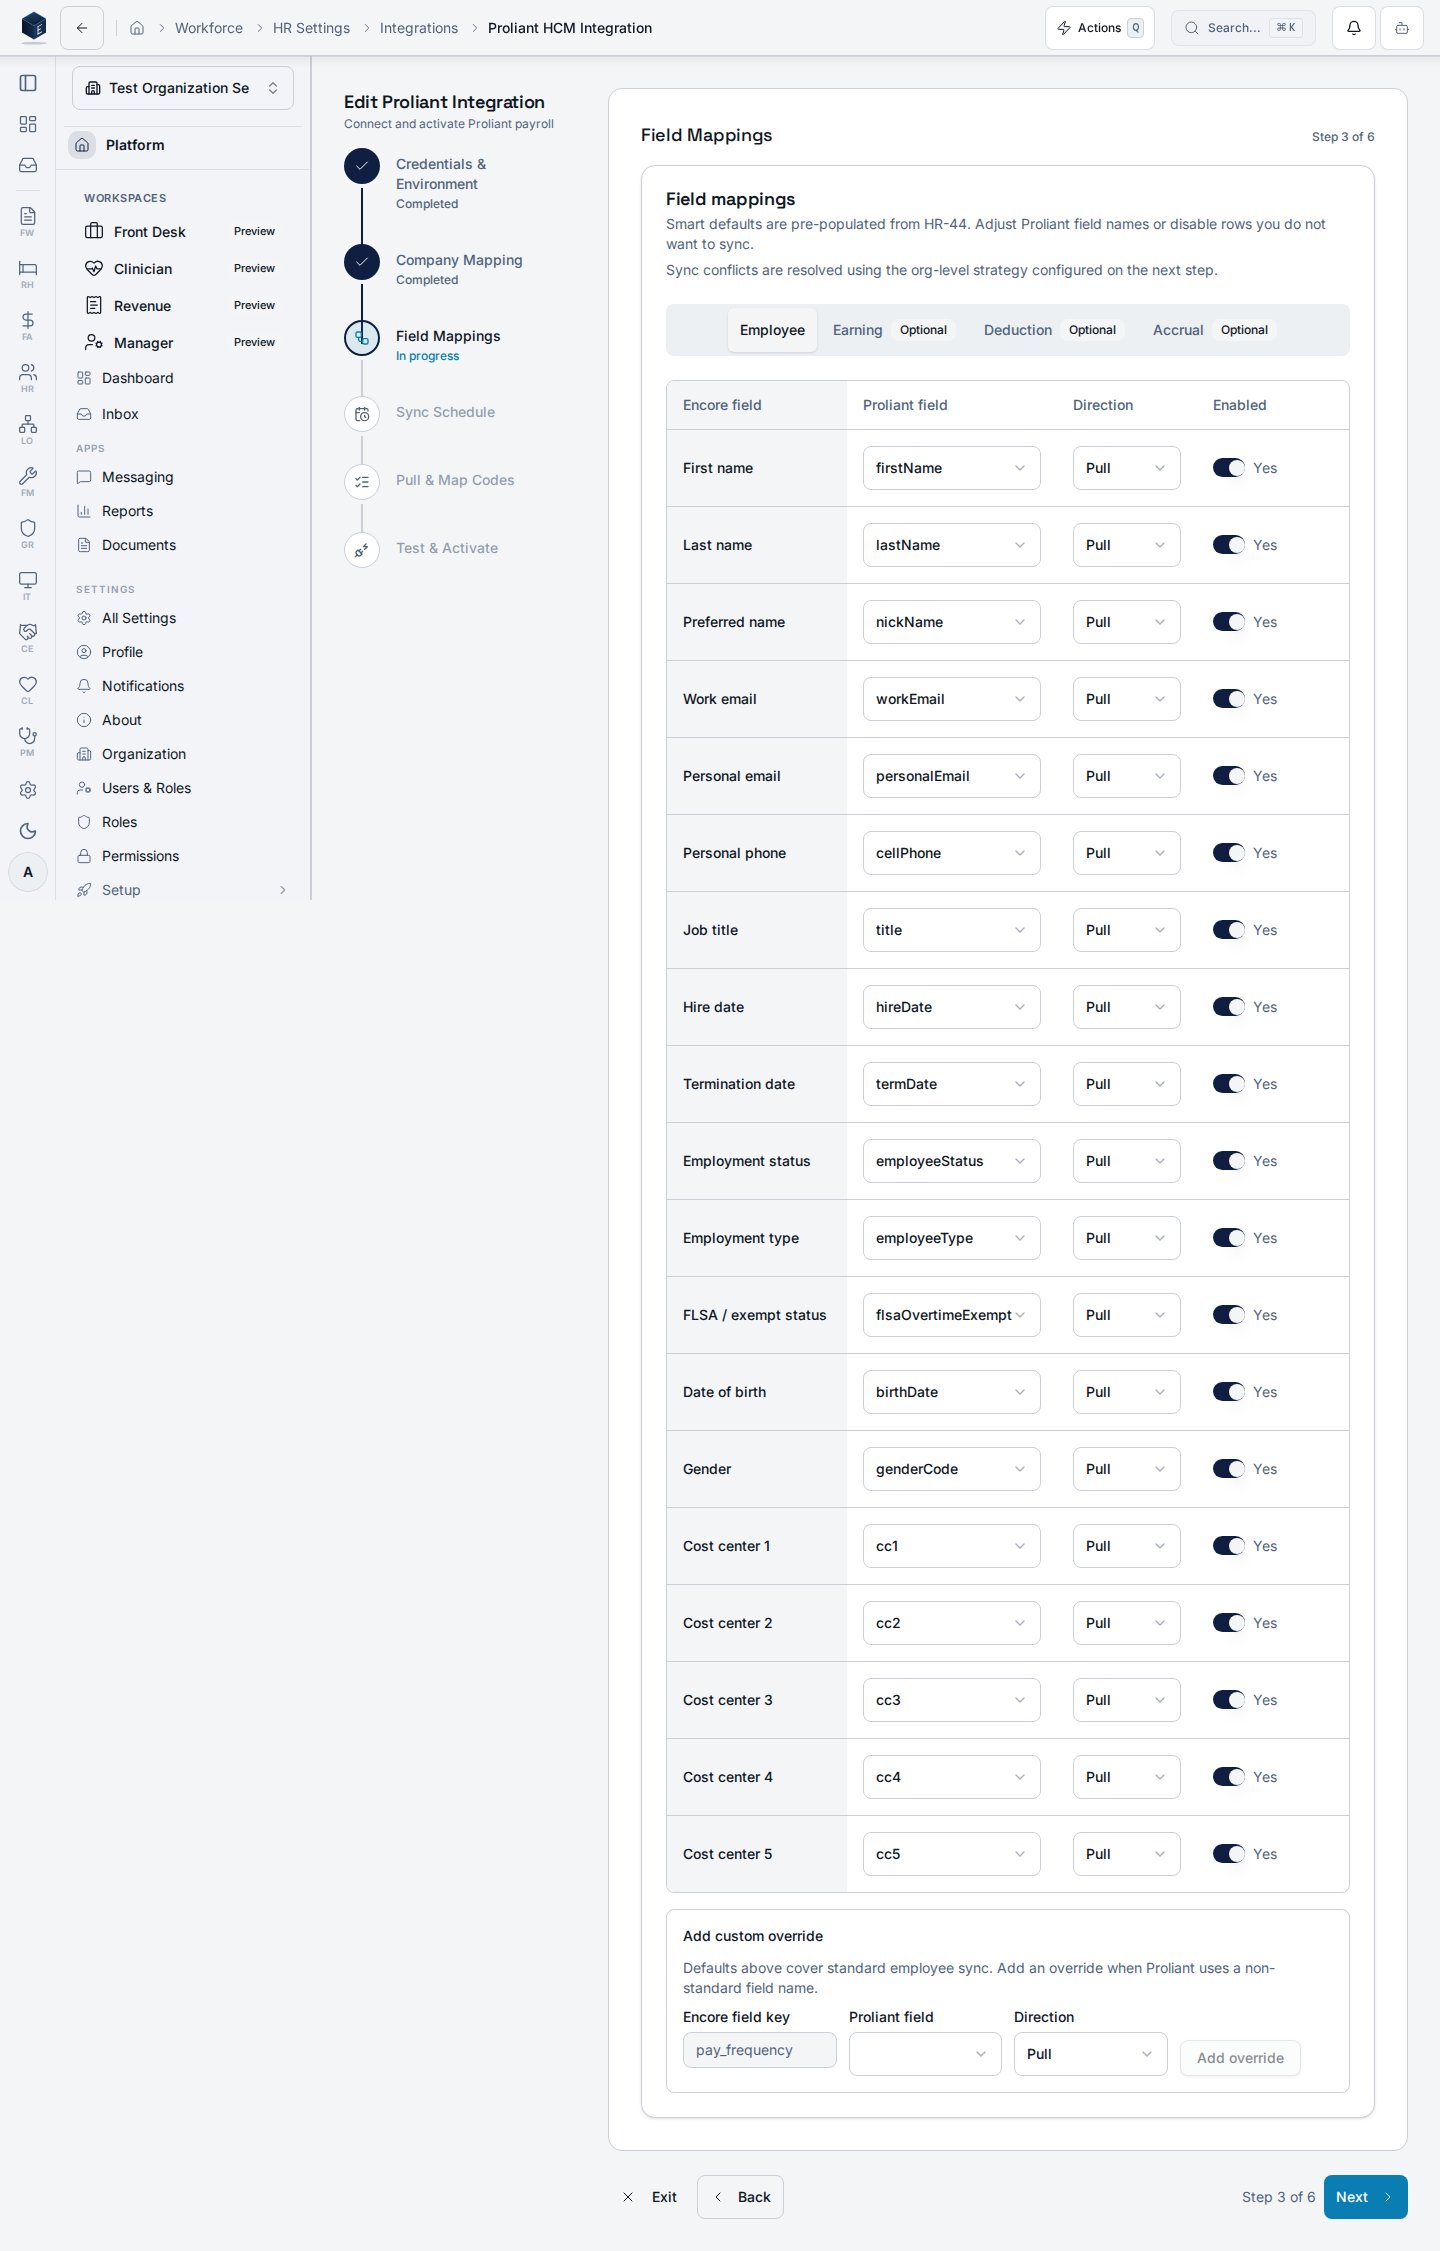
 Review which Encore fields sync to Proliant for employees, earnings, deductions, and accruals.
Defaults are sensible; adjust only where your Proliant configuration differs.
Review which Encore fields sync to Proliant for employees, earnings, deductions, and accruals.
Defaults are sensible; adjust only where your Proliant configuration differs.
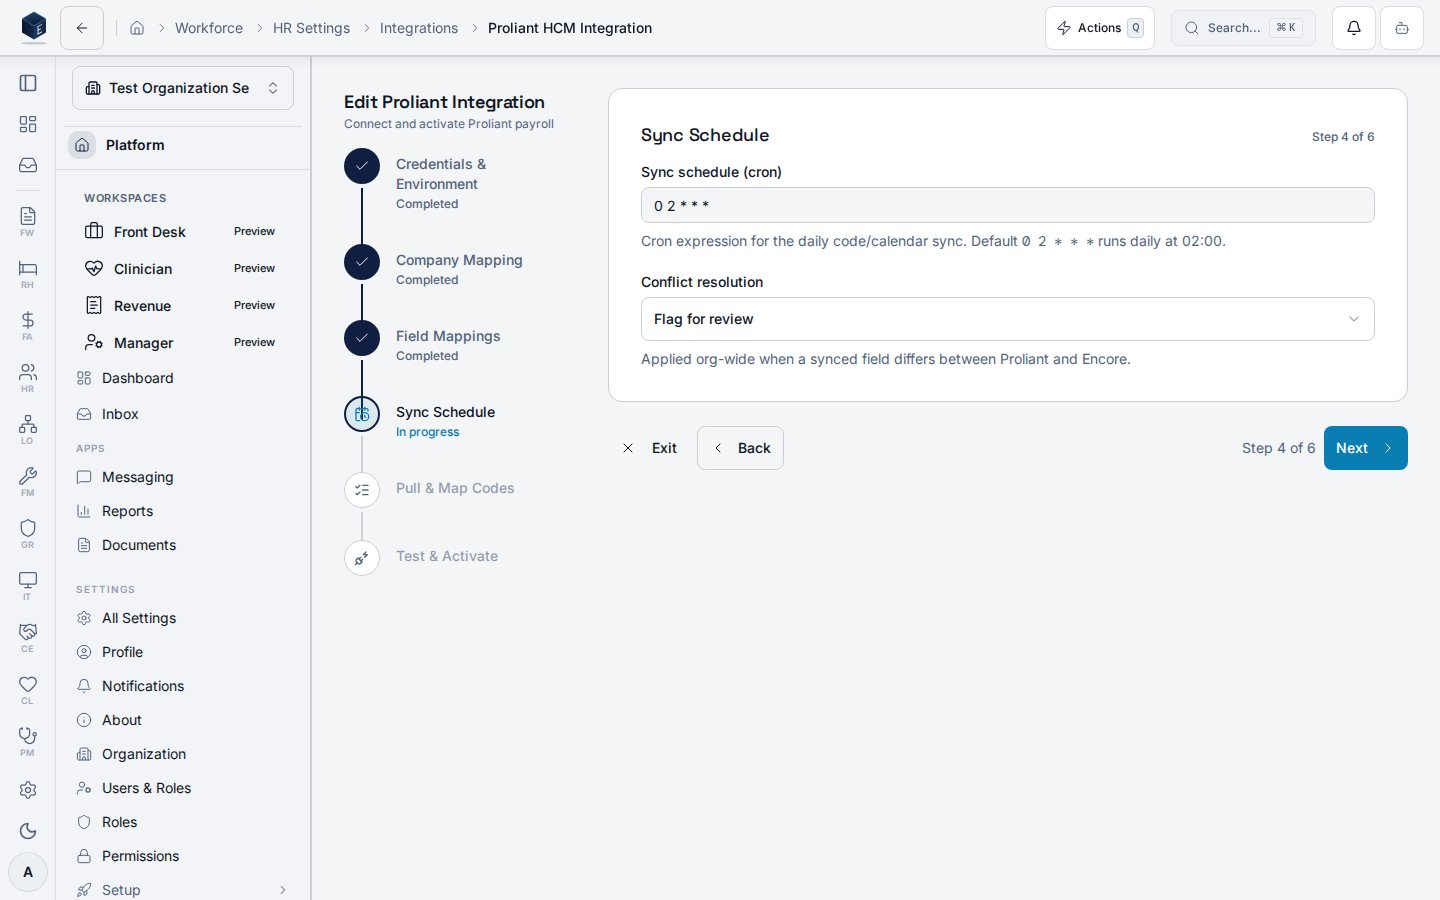
 Choose how often Encore syncs with Proliant. The default is daily at 02:00 (Proliant has no
webhooks, so sync is polling-based).
Choose how often Encore syncs with Proliant. The default is daily at 02:00 (Proliant has no
webhooks, so sync is polling-based).
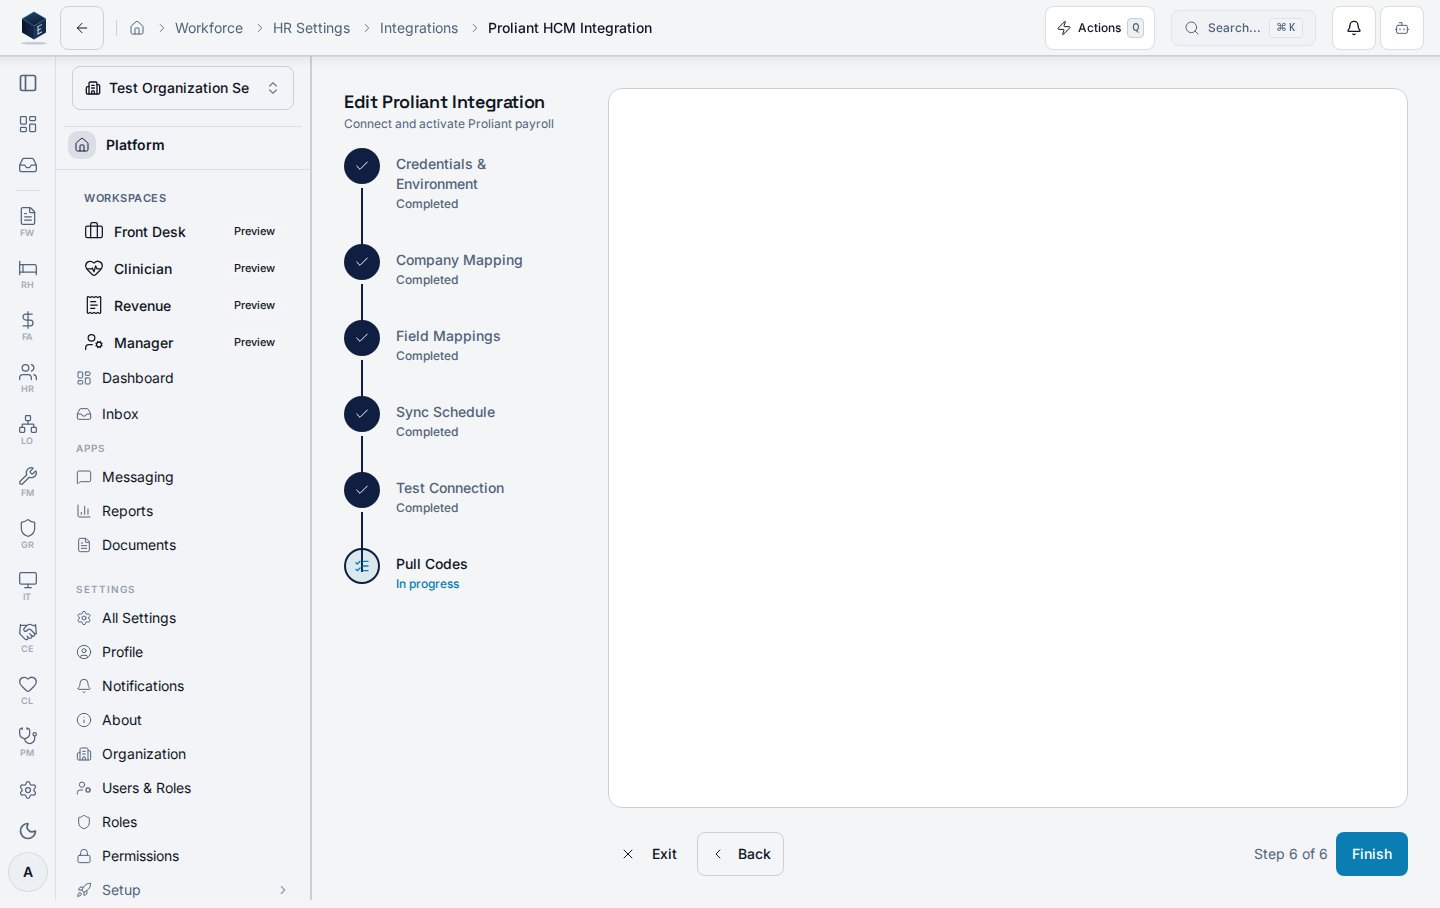
 Pull reference codes from Proliant (earnings, deductions, accruals, jobs, pay frequencies,
tax forms, employee status, and more) and assign each one to an Encore value from the
constrained dropdown. Codes that don't apply to your organization can be marked
**N/A — skip this code**.
A readiness banner at the top of the table reports **"N/6 required families ready"** across
`employee_status`, `employee_type`, `pay_frequency`, `tax_form`, `deduction`, and `accrual`.
`job`, `gender`, and `earning` are recommended but don't block. Define your Encore earning
types in [Earning Types](/hr/earning-types) before mapping so the `earning` family has a
constrained dropdown and is eligible for AI suggestions.
Use **Suggest mappings with AI** to pre-fill candidates across all go-live families, or pick
each Encore value by hand — see [AI-assisted code mapping](/hr/proliant-ai-code-mapping).
Pull reference codes from Proliant (earnings, deductions, accruals, jobs, pay frequencies,
tax forms, employee status, and more) and assign each one to an Encore value from the
constrained dropdown. Codes that don't apply to your organization can be marked
**N/A — skip this code**.
A readiness banner at the top of the table reports **"N/6 required families ready"** across
`employee_status`, `employee_type`, `pay_frequency`, `tax_form`, `deduction`, and `accrual`.
`job`, `gender`, and `earning` are recommended but don't block. Define your Encore earning
types in [Earning Types](/hr/earning-types) before mapping so the `earning` family has a
constrained dropdown and is eligible for AI suggestions.
Use **Suggest mappings with AI** to pre-fill candidates across all go-live families, or pick
each Encore value by hand — see [AI-assisted code mapping](/hr/proliant-ai-code-mapping).
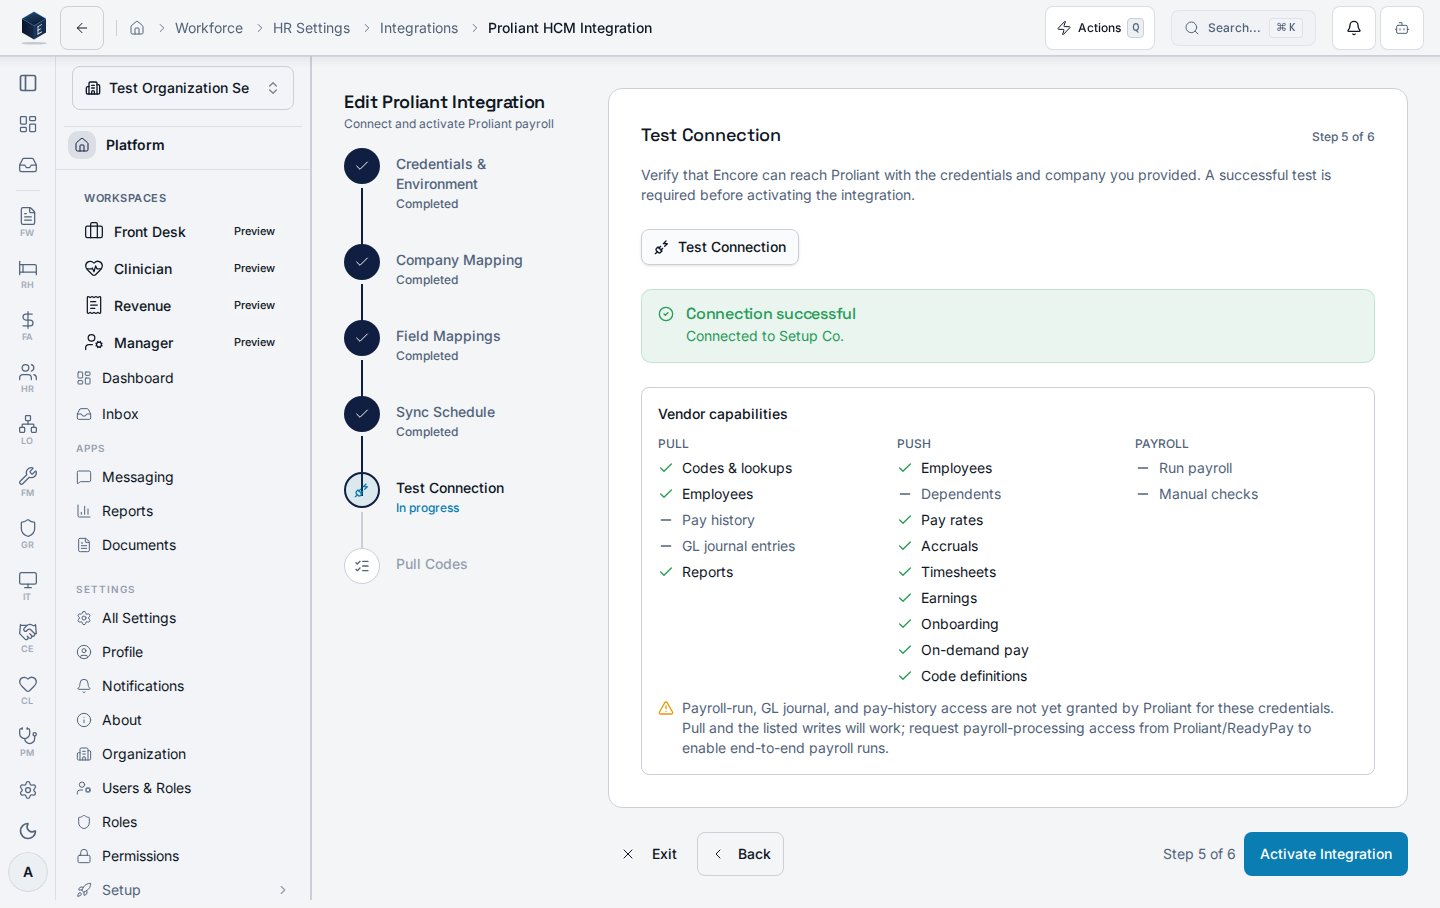
 Run the connection test. A successful result ("Connection successful") confirms Encore can reach
Proliant with the supplied credentials and company.
**Activate Integration** stays disabled until both gates are green: the connection test passes
**and** every required code family is mapped (or explicitly N/A). Once activated, the page
switches to the **Manage** view.
Run the connection test. A successful result ("Connection successful") confirms Encore can reach
Proliant with the supplied credentials and company.
**Activate Integration** stays disabled until both gates are green: the connection test passes
**and** every required code family is mapped (or explicitly N/A). Once activated, the page
switches to the **Manage** view.
 ## Resuming an in-progress setup
The wizard autosaves a credential-safe draft after every step in **Set Up** mode, so you can close
the page and come back later without losing your place. Drafts capture the step you were on and the
non-secret values you entered (for example, company mapping, sync schedule, field-mapping choices).
**API keys and secrets are never persisted** — you re-enter them on resume.
When you reopen **HR Settings → Integrations → Proliant** with an in-progress draft, the wizard
prompts you to choose:
* **Resume** — Reopen the draft at the step where you left off, with your saved non-secret values
restored. Re-enter credentials on the Credentials & Environment step.
* **Start Fresh** — Begin a new run. The previous draft is left intact and can be deleted from the
resume dialog.
* **Delete** — Remove a stale draft you no longer want. When the last draft is deleted, the wizard
starts a fresh run automatically.
Resume only applies in **Set Up** mode (no integration exists yet). Once the integration is
activated, the **Manage** view treats the database record as the source of truth. Reopening the
wizard via **Edit Integration** hydrates from that record instead of from any draft.
Exiting the wizard before activation marks the draft as abandoned but keeps it available for
resume. Selecting **Activate Integration** on the final step completes the run and clears the draft.
## After activation
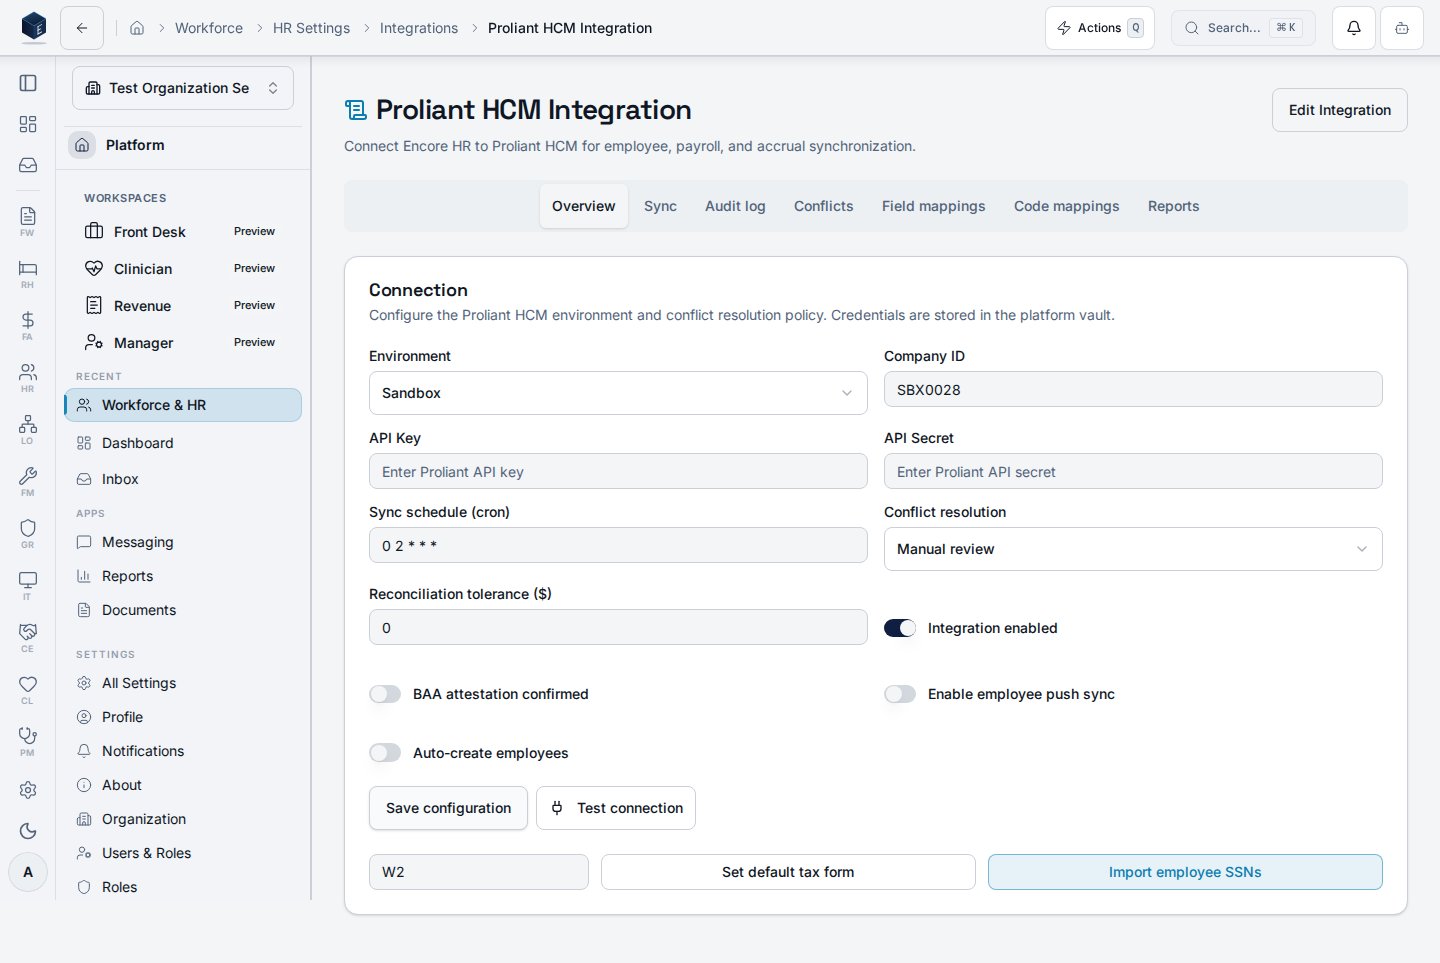
When you finish, the page switches from the empty state to the **Manage** view, with an **Edit
Integration** button and the connection summary. From here you manage sync, conflicts, field
mappings, code mappings, and the audit log — see the [admin guide](/hr/hr-44-admin-guide).
## Resuming an in-progress setup
The wizard autosaves a credential-safe draft after every step in **Set Up** mode, so you can close
the page and come back later without losing your place. Drafts capture the step you were on and the
non-secret values you entered (for example, company mapping, sync schedule, field-mapping choices).
**API keys and secrets are never persisted** — you re-enter them on resume.
When you reopen **HR Settings → Integrations → Proliant** with an in-progress draft, the wizard
prompts you to choose:
* **Resume** — Reopen the draft at the step where you left off, with your saved non-secret values
restored. Re-enter credentials on the Credentials & Environment step.
* **Start Fresh** — Begin a new run. The previous draft is left intact and can be deleted from the
resume dialog.
* **Delete** — Remove a stale draft you no longer want. When the last draft is deleted, the wizard
starts a fresh run automatically.
Resume only applies in **Set Up** mode (no integration exists yet). Once the integration is
activated, the **Manage** view treats the database record as the source of truth. Reopening the
wizard via **Edit Integration** hydrates from that record instead of from any draft.
Exiting the wizard before activation marks the draft as abandoned but keeps it available for
resume. Selecting **Activate Integration** on the final step completes the run and clears the draft.
## After activation
When you finish, the page switches from the empty state to the **Manage** view, with an **Edit
Integration** button and the connection summary. From here you manage sync, conflicts, field
mappings, code mappings, and the audit log — see the [admin guide](/hr/hr-44-admin-guide).
 ## What syncs to Proliant
Encore is the system of record; Proliant/ReadyPay runs tax calculation, payroll
processing, and filing. With push enabled, Encore writes employee data to
Proliant so you never re-key it there:
* **Pull:** employees + all reference codes (earning, deduction, job, shift, cost
centers, taxes, pay frequencies, positions, and more).
* **Push (per employee):** demographics, **pay rate, tax elections (W-4), direct
deposit, deduction and earning assignments, emergency contacts** — a new-hire
sync sends them together. Values are mapped to Proliant's codes automatically
using your code mappings. Every push is idempotent: re-running a sync never
double-applies (a record that already exists for its date is left as-is).
* **Push (codes):** Encore-defined earning/deduction/job/shift/cost-center
definitions can be written back so they exist in Proliant before assignment.
The **Test Connection** step shows a *Vendor capabilities* panel listing exactly
what your credentials may do. The **payroll run** (start → submit), GL journal,
and pay-history pulls require a payroll-processing grant from ReadyPay; if they
aren't enabled yet, the panel says so and the wizard tells you to request access.
Use a dry-run push (and per-employee scoping) before enabling push broadly — it
previews exactly what would be sent to Proliant without writing anything.
These screenshots are generated automatically from the local end-to-end test lane
(`npm run docs:shots:proliant`) and kept fresh by the `docs:shots:check` gate, so they stay in sync
with the live UI.
## What syncs to Proliant
Encore is the system of record; Proliant/ReadyPay runs tax calculation, payroll
processing, and filing. With push enabled, Encore writes employee data to
Proliant so you never re-key it there:
* **Pull:** employees + all reference codes (earning, deduction, job, shift, cost
centers, taxes, pay frequencies, positions, and more).
* **Push (per employee):** demographics, **pay rate, tax elections (W-4), direct
deposit, deduction and earning assignments, emergency contacts** — a new-hire
sync sends them together. Values are mapped to Proliant's codes automatically
using your code mappings. Every push is idempotent: re-running a sync never
double-applies (a record that already exists for its date is left as-is).
* **Push (codes):** Encore-defined earning/deduction/job/shift/cost-center
definitions can be written back so they exist in Proliant before assignment.
The **Test Connection** step shows a *Vendor capabilities* panel listing exactly
what your credentials may do. The **payroll run** (start → submit), GL journal,
and pay-history pulls require a payroll-processing grant from ReadyPay; if they
aren't enabled yet, the panel says so and the wizard tells you to request access.
Use a dry-run push (and per-employee scoping) before enabling push broadly — it
previews exactly what would be sent to Proliant without writing anything.
These screenshots are generated automatically from the local end-to-end test lane
(`npm run docs:shots:proliant`) and kept fresh by the `docs:shots:check` gate, so they stay in sync
with the live UI.